This article describes how early American silversmiths made sterling silver spoons, from melting metal to casting to rolling, annealing, hammering, and honing. It originally appeared in the January 1939 issue of American Collector magazine (Volume VII Number 12), a publication which ran from 1933-1948 and served antique collectors and dealers.
Under the patient probe of research, our silversmiths have emerged as definite personalities. They were men of many interests, prominent in their communities, and the number of them who played important civic or patriotic roles is impressive. In fact, we frequently become so engrossed in their diversity of achievement that we tend to overlook what lies back of the term silversmith.

From Strip of Metal to Finished Spoon: From left to right, these six stages show the principal steps followed by Early American silversmiths in spoonmaking. It started with the strip of rolled silver at the left. Next, shaping of the bowl and handle was started and continued through three stages. Then with a punch and die the bowl was "struck up" that is, made concave and the handle was given its proper curve. After this, the edges were smoothed with files and the spoon carefully polished with burnishing tools. This set of steps follows the design of a Paul Revere spoon made about 1770.
The man who earned the right to that trade designation might later become as wealthy as the mintmaster, John Hull, as famous as Paul Revere, patriot and industrialist, or as important in the development of his town as Colonel Standish Barry of Baltimore; but from the most colorful to the most obscure, every silver craftsman had to undergo a rigorous apprenticeship of at least two years. Then he became a journeyman. When and if, he set up for himself, depended on circumstances and his own business acumen.
Silversmithing required not only artistic ability but brawn, for the tools were all wielded by hand. The simplest product of this craft was spoons. The various steps in their making are illustrated here, and after following the process one no longer marvels at the ability shown by these craftsmen in other fields.
First, the silver coin and scrap metal that made up the raw material were melted in crucibles in a charcoal-fired forge until molten but not so hot as to be over-brittle and full of flaws when cold. Then it was cast in bar molds of 50 ounces troy weight. When cool, each bar of silver was annealed to make the metal malleable.
Next, the bars were rolled out into ribbons of uniform width and thickness, eight to twelve feet long, between polished steel rollers. It was the work of apprentices to turn these. During this process annealing was repeated several times, and when the master workman considered the metal truly tempered, the long strips of silver were cut into short pieces of proper size for an individual spoon. Seven inches for table spoons and five, for teaspoons.
There was another annealing and when red-hot these pieces were boiled in diluted sulphuric acid. Now came the actual spoonmaking. Each short strip was cut lengthwise, twice for tablespoons and three times for teaspoons, with a large pair of shears along a line previously scratched by a sharp awl-point gauge. Then followed the hammering and shaping of the bowl which was done on a polished steel “stake” about six inches square and with slightly rounded upper surface. The hammer, also of polished steel and weighing from four to twelve pounds, was swung by the craftsman with quick blows and amazing precision.
With bowl and handle only slightly shaped, there was another annealing; then further shaping and more annealing. After this the bowl was planished or given its final thickness by hammering and the shaping of the handle completed. It now began to look like a spoon though flat and a little irregular in outline.
One more annealing, but of the bowl only, after which the latter was given its concave shaping with a die and punch and the handle took on its arched shape. It was now a spoon but with edges still rough and too sharp. These were now filed smooth with coarse and fine files and a three-cornered scraper of polished steel. It was honed with “Scotch stone” and water, brushed with Bristol brick and oil on a foot-treadle lathe, wiped clean, and then given its final annealing and boiling in sulphuric acid. Finally, rinsed in clear water and scoured with fine sand, it was ready for the final process, burnishing.
This article originally appeared in American Collector magazine, a publication which ran from 1933-1948 and served antique collectors and dealers.
 Prop Master: How a "Star Wars" Superfan Scoured the Earth for Space Debris
 How the Military Waged a Graphic-Design War on Venereal Disease
 Capturing a Generation of Aviation Geniuses and Their Incredible Flying Machines
 Amazing! Spectacular! Step Right Up and Get a Piece of the Greatest Shows on Earth
 Are You Bold and Brassy Enough to Wear Vintage Napier Jewelry?
 Sterling Silver FlatwareWhen it comes to antique sterling silver flatware, age is not everything. F…
 Silver SpoonsAs the oldest type of flatware, spoons have existed in some form or another…
 Mari Tepper: Laying it on the Line
 Nice Ice: Valerie Hammond on the Genteel Charm of Vintage Canadian Costume Jewelry
 How Jim Heimann Got Crazy for California Architecture
 Modernist Man: Jock Peters May Be the Most Influential Architect You've Never Heard Of
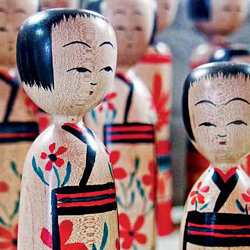 Meet Cute: Were Kokeshi Dolls the Models for Hello Kitty, Pokemon, and Be@rbrick?
 When the King of Comedy Posters Set His Surreal Sights on the World of Rock 'n' Roll
 How One Artist Makes New Art From Old Coloring Books and Found Photos
 Say Cheese! How Bad Photography Has Changed Our Definition of Good Pictures
 Middle Earthenware: One Family's Quest to Reclaim Its Place in British Pottery History
 Fancy Fowl: How an Evil Sea Captain and a Beloved Queen Made the World Crave KFC
Hello,
im interested in using this image as a logo, is this posible? I love spoons and really this picture tells a great story of the steps of making a spoon
Does anyone know of a register of early silversmiths? I’m particularly interested in silversmithing in 18th century New England and New York.
What does a letter T or E in a circle on sterling flatwear mean?