


Posted 11 years ago
 epson233
(73 items)
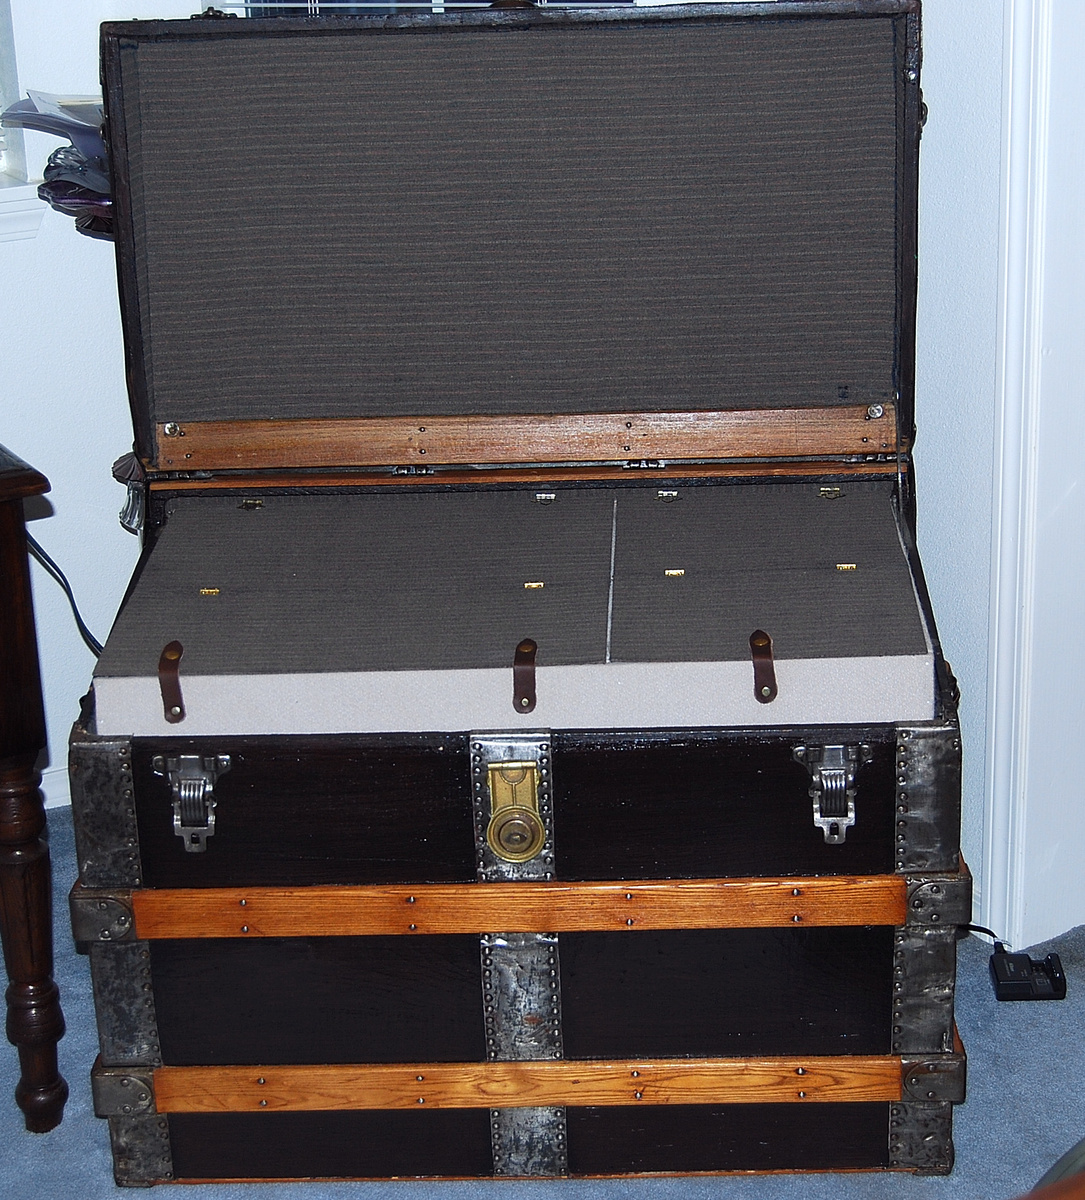
This trunk in its former life was a green canvas wall trunk -- as always the canvas was badly worn -- so what to do with a beautiful quality trunk that had spent 50 years in a cow shed -- and yes you could smell the whole herd
No more smells and after 90 hours of work time -- this one stores my material for sewing and quilting -- what turned out nice that i was pleased with after removing every stinking piece of canvas thread -- i did a three phase paint job on the wood -- some refurbished trunks of this type have had the canvas removed and the wood left natural with several coats of varnish which is very pretty but i wanted something different -- pic 3 shows the three phase painting done on the wood
All slats and metal parts where sanded or dremeled which brought back the nice patina on the metal -- which originally had black paint on all metal
Note this is what is known as a wall trunk -- you can open the lid and it will go straight up -- therefore not damaging a wall that it is placed against -- pic 4
As usual this trunk was missing its trays so Ted and I had to reconstruct them -- we used red wood cedar and covered -- the cedar adds a nice aroma when the trunk is open and would also take care of any pesky critters that would want to dine on some of my stored fabrics -- oh heaven forbid that should happen
Again thanks to all who have commented on our trunks -- you make our days and inspire us to continue -- for those of you in the process of working on your pretties -- please do not hesitate to ask questions in your comments -- around here advise is always free
Another beauty -- fabulous workmanship. I love these hard to find wall trunks -- this one is a terrific example. What are your three phases of painting?
hi trunkman -- always love hearing from you -- the three phase process
phase 1 -- black paint -- dry over night
phase 2 -- gold wash mixed with glaze -- let sit 10 min
phase 3 -- top coat color mixed with glaze -- i used brown on this one -- let sit 10 min -- start combing with a square plastic dog brush -- this gives the lines and allows the other two colors to come out
The detail in your work is beyond perfect. I want to be your apprentice.
I would like to sign up too!
ok passion4trunks and trunkman -- pack your bags and bring your fishing gear -- will keep the lights on -- thanks that was very sweet of the both of you -- you made my day on this dark and rainy day here in vancouver --- burrrrrrrrrrrr
thanks for the love leighannrn
Beautiful work epson :-)
thanks heidi -- it is work that i and ted love -- bringing the old back to its former hey days -- thanks for taking the time to comment on her
you are truly welcome.. but I could not pass her without commenting... Thank you for posting. :-)
thanks heidi -- was just getting ready to go to your postings to see what you have in store for us tonight -- keep digging into grandpa's tools -- very entertaining and interesting
Thanks for the offer of questions answered. Is there a way to remove the lithograph? some I find are adhered well enough to leave, ( as if I could get them out safely ) and there is one I am working on now that is half bubbled up and half tightly adhered to the lid. I would really like to save it but am at a loss.
Beautiful truk..in a cow shed? Thanks.
hi trunkingforfun-- you can remove the lithographs with much patience -- i take a wet hot terrycloth rag and lay it over the lithograph -- keep it wet, hot & moist -- check it every so often (15 mins or so) and see if it is ready to give -- using some tweezers start to work around the edges -- if it is still not ready to give it up -- keep repeating -- trying to be careful not to tear the paper -- it may take the whole day pending on weather -- good summer job -- sit on the patio, feed some wildlife, enjoy your favorite beverage and a good book -- good luck
removing the lithos -- see above comments -- have noticed several members have asked this question -- it can be done with time & patience